
Why “and setups” Matter More Than Specs on Paper
People love to obsess over CPU models and GPU benchmarks, but in real life performance comes from the whole ecosystem: hardware, peripherals, ergonomics, lighting, cabling and even how your room is arranged. That’s what we’ll call “and setups” — everything around the device that turns a bare computer into a predictable, efficient workstation or battle-station. Whether you’re building gaming pc and setups, starting to stream, or planning a hybrid workspace, the configuration around the box often decides comfort, stability and even frame times under load. Let’s walk through concrete, practical decisions so you can stop randomly buying gear and instead assemble a coherent, technically sound setup that actually fits how you work and play every day.
Building Gaming PC and Setups: From Case to Cable Management
Balancing Components Instead of Chasing One “Beast” Part
For a gaming-focused build, avoid the trap of overinvesting in a GPU while neglecting power, cooling and peripherals. Aim for a balanced configuration: a mid-to-high tier CPU with at least 6 performance cores, 32 GB RAM for modern titles and background apps, plus an SSD with enough capacity for your main game library. When planning gaming pc and setups, check total system power under peak load with an online PSU calculator, then add 30–40% headroom for future upgrades. Prioritize a power supply with 80+ Gold efficiency and decent ripple suppression, because unstable rails can cause random crashes that look like “driver issues” but actually come from the PSU. This systemic thinking gives you smoother gaming than simply slapping in the most expensive graphics card you can afford.
Airflow, Acoustics and Thermal Headroom
Thermal design is part of the setup, not an afterthought. Pick a case with unobstructed front intake and space for at least two 120/140 mm fans in the front and one exhaust in the rear. Use a simple pressure strategy: slightly positive pressure (more intake than exhaust) keeps dust out and reduces hot spots around the GPU. When tuning fan curves in BIOS or software, set a shallow ramp between 40–70°C to avoid abrupt speed jumps that create annoying oscillating noise. This way you maintain consistent temperatures without a “jet engine” effect. Proper airflow planning also helps VRMs and NVMe drives, extending their lifespan and preventing thermal throttling, which is often misdiagnosed as “poor optimization” of a game rather than a cooling bottleneck in the overall setup.
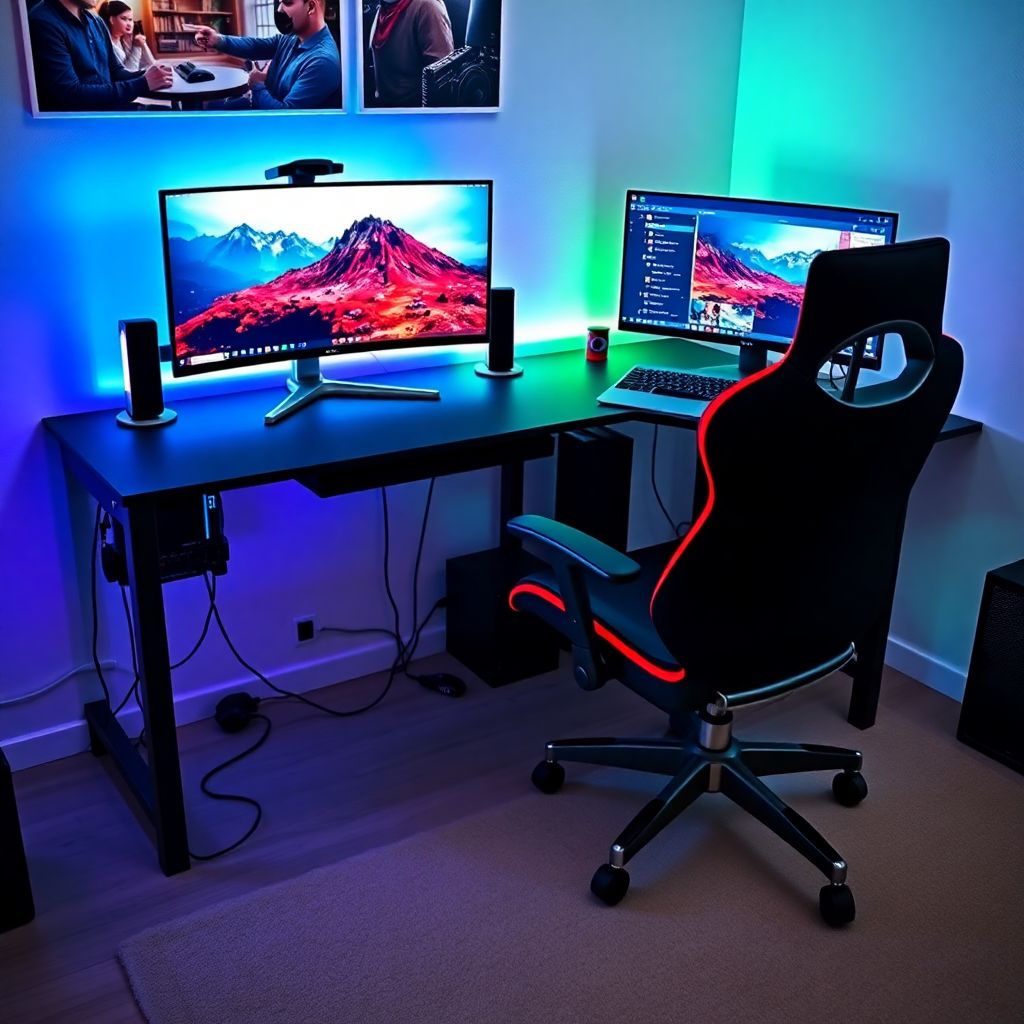
Peripheral Layout: Monitors, Input Devices and Cable Routing
Even the strongest rig feels clumsy if monitors sit too high, the mouse cable drags and cables form a nest behind the desk. Use a monitor arm to fine-tune height and distance; eye level should be roughly at the upper third of the display, with 60–80 cm viewing distance depending on size and resolution. For fast FPS titles, prefer a 144 Hz or higher display with low input lag over a pure 4K resolution upgrade. Route keyboard and mouse cables through grommets or along an under-desk tray, and fix them with Velcro straps instead of plastic ties so you can reconfigure easily. These small decisions transform raw hardware power into a setup where your hands, eyes and system work as one, minimizing micro-irritations that add up during long sessions.
Designing the Best Gaming Desk and Setups
Choosing the Right Desk Surface and Size
The desk is a structural element of your system just like the case frame. For the best gaming desk and setups, target a depth of at least 70 cm so you can keep the monitor at a healthy distance without pushing your keyboard to the very edge. Width depends on peripheral count, but 140–160 cm is usually enough for dual monitors and speakers. Prefer a matte surface with low reflectivity to avoid glare from screens and rgb lights. If you can, pick a height-adjustable frame: a stable sit-stand desk lets you vary posture during long matches or work sessions, which reduces fatigue more than any ergonomic marketing buzzword. Check load rating vs. total weight, including monitors, PC tower if placed on the top, and heavy audio gear.
Ergonomics: Chair, Arm Position and Foot Support
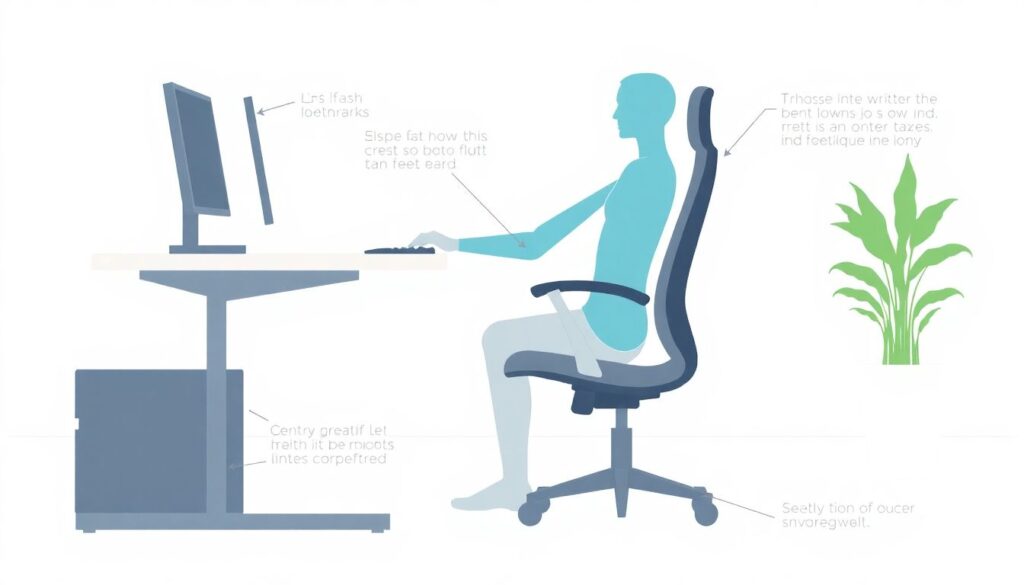
Ergonomics is not about buying a “gaming chair”; it’s about joint angles and support. You want elbows at roughly 90 degrees, wrists neutral (not bent upwards), and feet flat or resting on a low footrest. Adjust chair height until your forearms are parallel to the desk, then tweak armrests to support elbows without pushing shoulders up. If your desk is fixed and too high, a footrest plus raising the chair is usually better than living with elevated shoulders. This configuration reduces strain on wrists and neck, which is critical for anyone mixing gaming sessions with long work hours. Think of these parameters as part of your overall setup configuration, just like DPI or keybinds, because they directly affect performance and consistency in precision tasks.
Under-Desk Infrastructure: Power, Networking and Cable Management
Good setups hide complexity without making maintenance painful. Mount a power strip with surge protection to the underside of the desk rather than leaving it on the floor; that keeps plugs accessible and off the dust layer. For networking, prioritize wired Ethernet where possible, running a flat cable along the wall or under a rug if you can’t route internally. Wi‑Fi is fine as a backup but introduces jitter that you’ll feel in competitive titles. Use adhesive cable raceways or an under-desk basket to keep PSU, display and peripheral cables grouped yet separable by function: power on one side, signal on the other to minimize interference. This discipline makes future upgrades — like adding another monitor or audio interface — a simple extension rather than a painful recabling day.
Streaming Equipment and Setups: From “Just Go Live” to Stable Pipelines
Camera, Lighting and Framing for Clean Video
Solid streaming equipment and setups start with consistent image quality, not cinematic gear. A mid-range mirrorless or even a good USB webcam is enough if you control lighting. Use a key light at about 45 degrees from your face and slightly above eye level, diffused with a softbox or panel diffuser to avoid harsh shadows. Set camera shutter speed to roughly double your frame rate (e.g., 1/60 for 30 fps), fix white balance so colors don’t shift mid-stream, and lock exposure to prevent brightness pumping when your game scene changes. Mount the camera just above the primary monitor so your natural gaze aligns with chat and gameplay. This creates a stable visual pipeline where the viewer sees a clear, predictable image, not a constantly auto-adjusting blur.
Audio Chain: Microphone, Interface and Noise Control
Viewers tolerate mediocre video but leave fast when audio is bad. Use a dynamic microphone if your room is noisy; they’re less sensitive to keyboard clicks and room echo than condensers. Connect via a basic audio interface or a clean USB preamp rather than a noisy motherboard input. In software, apply a simple chain: high-pass filter around 70–90 Hz to remove rumble, noise gate to eliminate idle background sounds, and gentle compression (2:1 or 3:1 ratio) to stabilize level. Monitor your own stream return occasionally to check for clipping or aggressive gating. Combine this with physical noise mitigation — soft pads under your keyboard, closed-back headphones — and your setup becomes far more professional without high-budget studio hardware.
Encoding, Scenes and Workflow Optimization
On the software side, treat your streaming rig as a small production studio. If your GPU supports it, use hardware encoders like NVENC or AMF to offload video encoding from the CPU, leaving more headroom for the game. Prebuild scenes for “Gameplay”, “Just Chatting”, “BRB” and “Tech Issues” with consistent audio routing so you don’t improvise sources mid-stream. Map scene switching and mute toggles to a keypad or macro keys rather than alt-tabbing. This turns your streaming setup into a deterministic workflow: you know exactly what happens on screen and in audio with each button press. That reliability is what makes a setup feel “professional”, far more than overlay animations or expensive capture cards.
Home Office Computer and Setups for Hybrid Life
Separating Work Context from Play Without Two PCs
You don’t always need a second machine to keep work and gaming apart; you need logical and physical separation inside one environment. For a home office computer and setups, configure separate user profiles or at least distinct desktops: one stripped down to productivity apps, the other with launchers and overlays. Use different wallpapers, color themes and even keyboard layouts to create mental boundaries. Physically, you can place your work laptop on a vertical stand while the desktop handles games, both feeding the same monitors via distinct inputs; with proper KVM switching, one keyboard-mouse pair controls whichever system is active. This approach saves space and budget while letting you switch modes in seconds without replugging cables.
Display Configuration for Productivity and Comfort
For mixed work and gaming, resist the temptation to buy a single ultra-wide without thinking through your tasks. Developers, analysts and designers often benefit more from dual displays: one for primary work, one for documentation or communication tools. Calibrate brightness and color temperature to around 5000–6500K to reduce eye strain, and enable a low-blue-light mode only in late hours to avoid color shifts during daytime critical work. Configure virtual desktops by workflow: one for coding and terminals, one for design tools, one for communication and browser tabs. This spatial organization turns your monitors into a structured workspace rather than a chaotic multi-window dump, and once you bake these patterns into your daily routine, context switching becomes dramatically faster and less mentally taxing.
Peripheral Sharing, Docking and Backup Discipline
Docking hardware is a key part of modern setups. A USB‑C dock or Thunderbolt hub can feed power, displays and high-speed storage to a laptop with a single cable, letting you arrive, plug in and work without reshuffling peripherals. Place external drives and backup targets out of immediate reach so accidental bumps don’t disconnect them mid-write. Automate backups with scheduled incremental jobs rather than manual copies; a setup that depends on your memory is not a reliable setup. For keyboard and mouse, consider wireless with multi-device pairing so you can flip between desktop and laptop with one button. This consolidates gear without forcing compromises on latency or comfort, especially with modern 2.4 GHz low-latency dongles.
RGB Lights and Setups for Gaming Without Turning the Room Into a Mess
Planning Lighting Zones Instead of Random LEDs Everywhere
With rgb lights and setups for gaming, the goal isn’t maximum brightness; it’s controlled ambience and visibility. Plan zones: background bias lighting behind monitors, accent strips along the desk or shelves, and optionally case lighting. Keep these under a single ecosystem when possible (same brand or protocol) so you can sync colors and brightness centrally instead of juggling multiple apps. Use warm or neutral static colors when working to avoid visual fatigue, then switch to scene-based color profiles for games if you like reactive effects. Bias lighting behind the monitor, set slightly dimmer than the display, reduces eye strain in dark rooms and improves perceived contrast without having to crank up panel brightness, which can worsen IPS glow and washed blacks.
Power, Control and Integration With the Rest of the Setup
LED lighting is still part of your electrical and network topology. Don’t overload a single wall outlet with strips, controllers and adapters in addition to your PC; distribute power through a quality surge-protected strip. For control, prioritize wired or hub-based solutions over Wi‑Fi-only bulbs that add latency and fail if the network glitches. Integrate lighting scenes with your streaming or gaming profiles so one action can dim room lights, turn on bias lighting and set case colors. If you use voice assistants, keep manual overrides available — a small physical remote or button — because no setup is robust if it depends on cloud services just to turn on lights. Thoughtful integration makes RGB complement performance instead of becoming yet another fragile gadget to babysit.
Keeping Aesthetics Maintainable Over Time
The most impressive setups are the ones that still look clean a year later. When mounting LED strips, use channels or diffusers instead of bare adhesive where possible; they protect the strip and make removal easier. Leave slack and service loops near controllers and PSU connections so you can replace sections without tearing everything apart. Document your wiring with photos or a quick sketch, especially if you route lights through the PC case and behind the desk. Over time, dust and adhesive fatigue will demand maintenance, and a maintainable design beats a one-time “Instagram build” every time. Treat RGB and decor like modular components of your overall environment — things you can refactor as needs change, not permanent glue-on ornaments.
Putting It All Together: A System-Level Mindset
When you think in terms of “and setups”, you stop buying isolated gadgets and start engineering an environment: airflow, ergonomics, audio routing, power distribution, lighting, cabling and workflow all tuned to how you actually use your space. Whether you chase the best gaming desk and setups, refine streaming equipment and setups, or merge a powerful gaming rig with a disciplined home office, the same principle applies: design for stability, comfort and repeatability first. Specs, RGB and brand names come after. Use that mindset as a checklist for any upgrade — ask how each new part fits into the whole system — and you’ll end up with a setup that quietly does its job every day instead of constantly demanding your attention.